The Titan Public API gives external developers programmatic access to SecurityScorecard observations and related resources. This guide walks a new caller from zero to a first successful response.
- An admin role in your SecurityScorecard organization (required to issue credentials).
- A current API major to target (see Versioning & lifecycle for how to pick one).
- A shell with
curl(or any HTTP client).
Credentials are issued from Credential Management in the SecurityScorecard UI. The Titan Public API uses OAuth 2.0 client credentials — each calling system holds a CLIENT_ID / CLIENT_SECRET pair, exchanges it for a short-lived access token, and attaches that token as a bearer credential on every API request.
In the SecurityScorecard app, navigate to Connectors → APIs in the left sidebar, then click + Create credential in the top right.
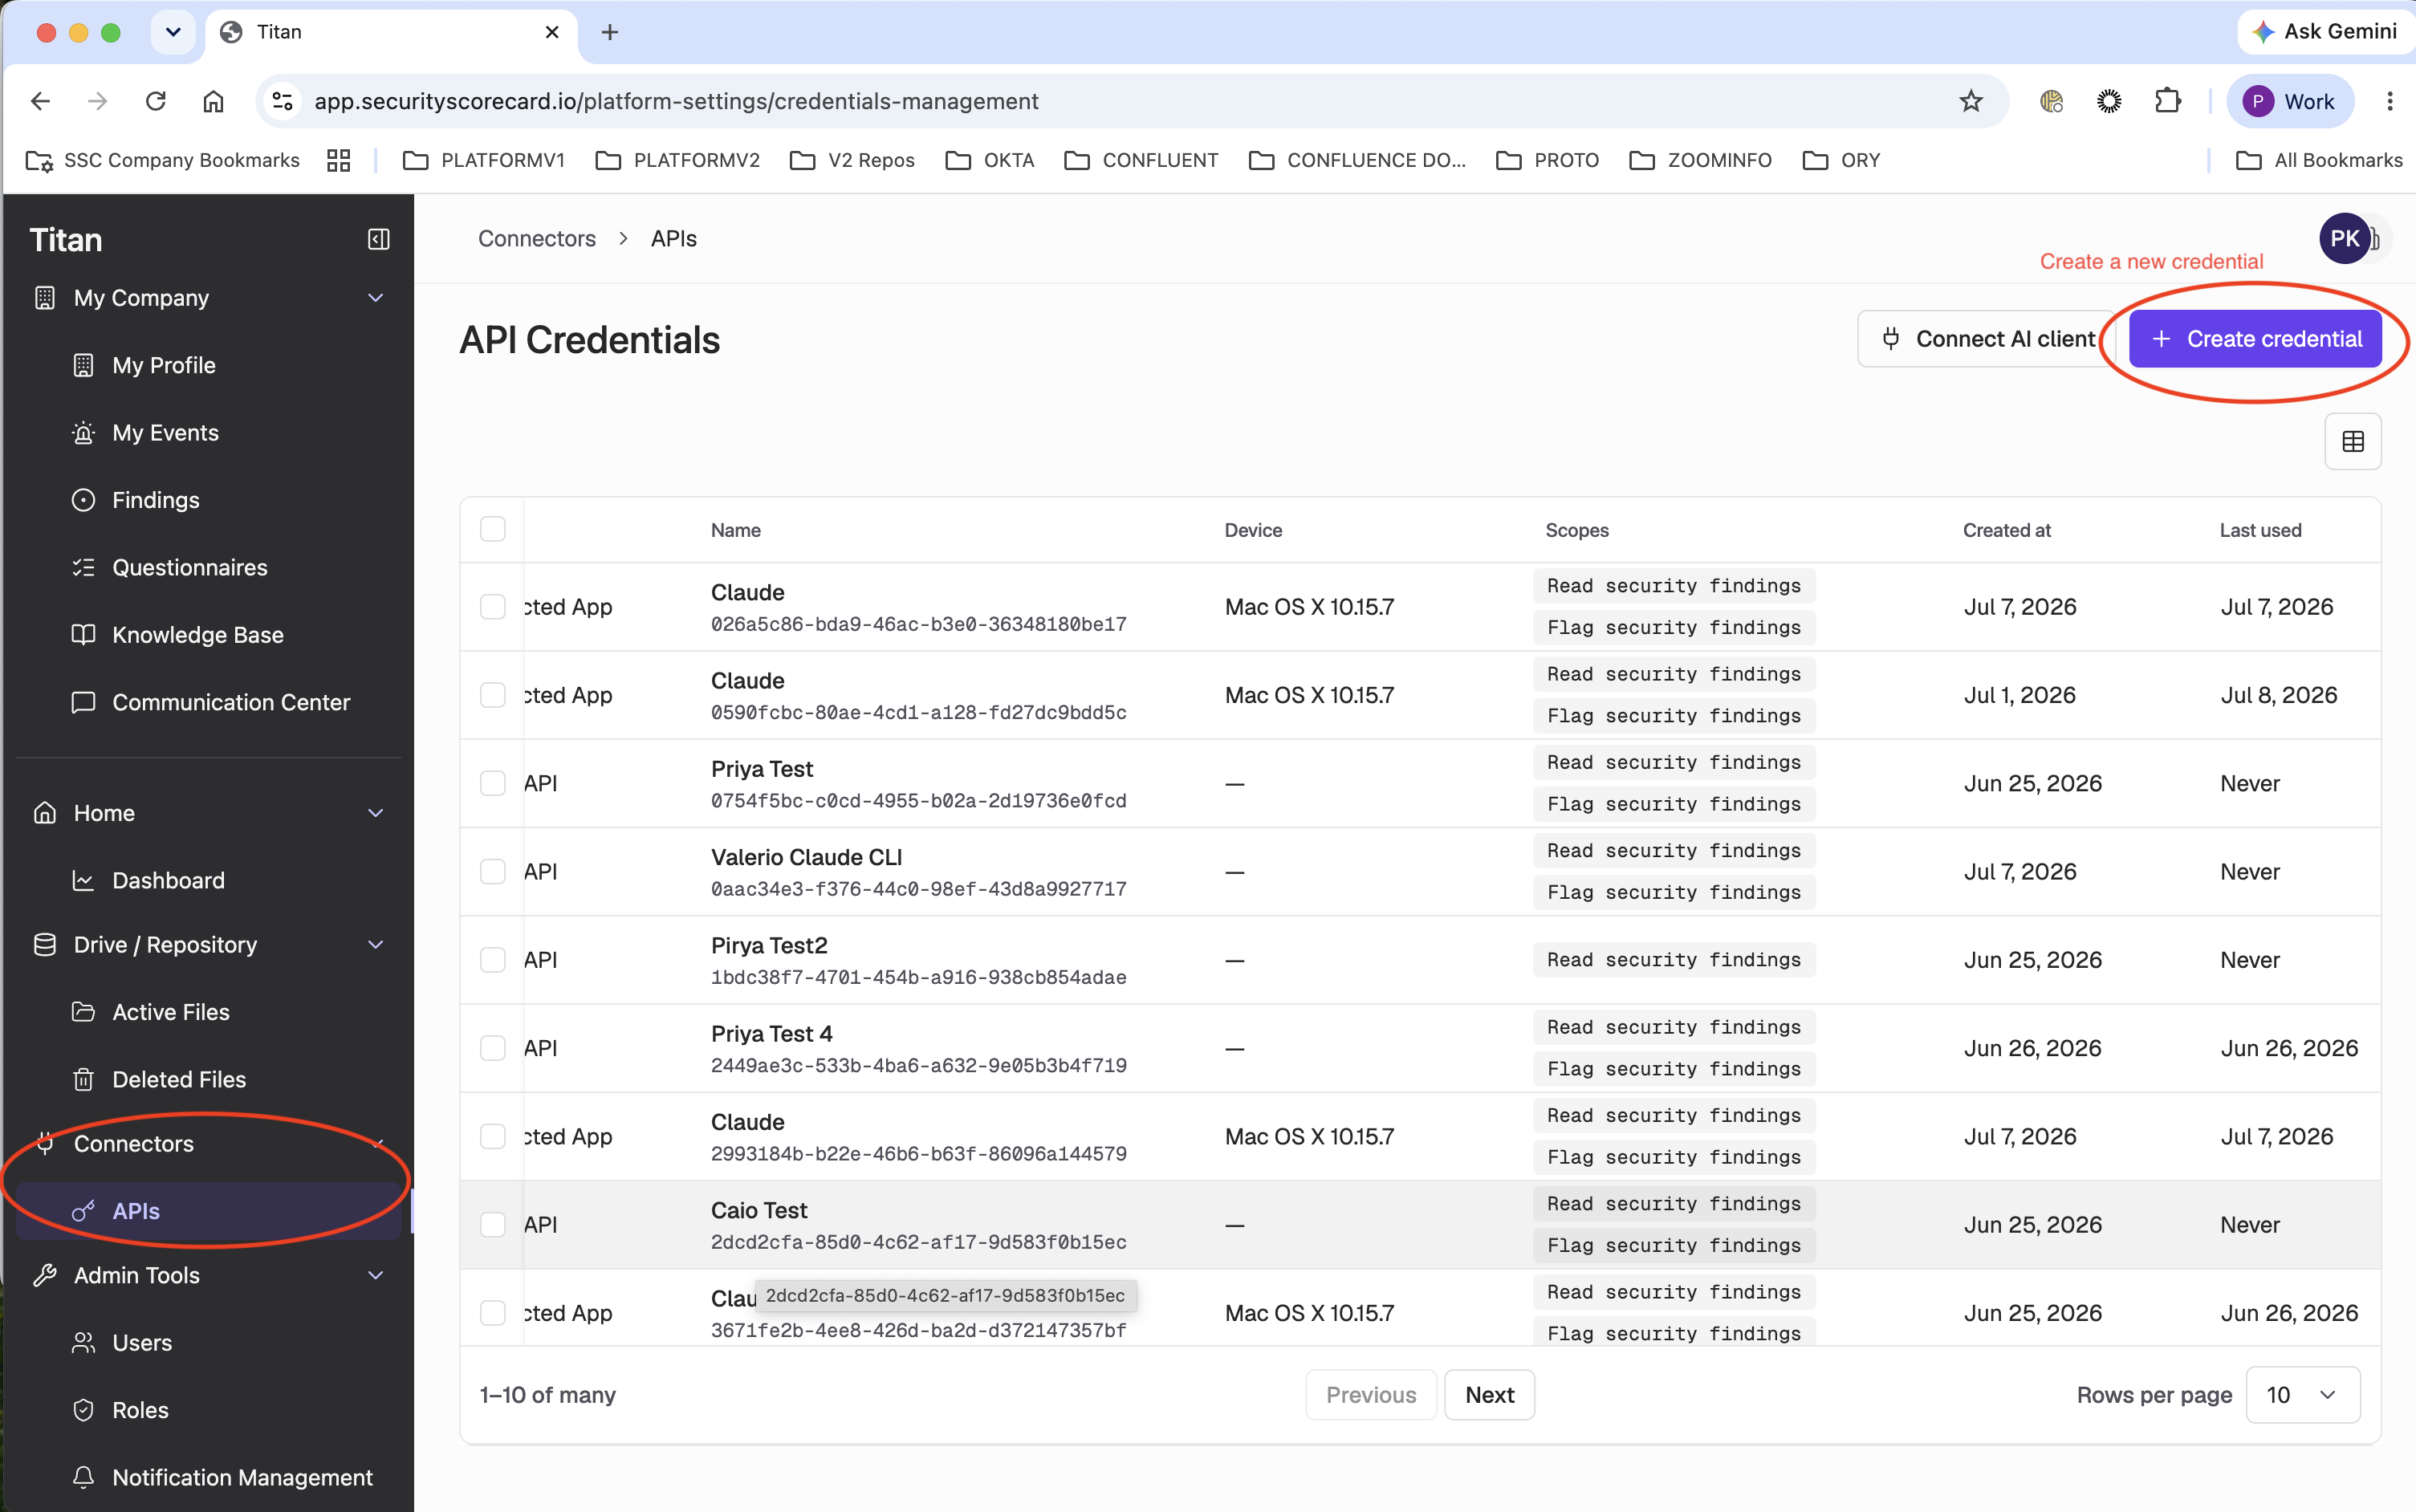
A slide-out panel opens. Provide:
- Label — a human-readable name for this credential (up to 80 characters). Use something that identifies the calling system, e.g.
nightly-etl-joborcontract-tests. - Scopes — pick the permissions this credential should carry. Available scopes today:
- Read security findings — read-only access across REST and MCP endpoints.
- Flag security findings — dispatch flag actions on observations.
Grant only the scopes the caller actually needs.
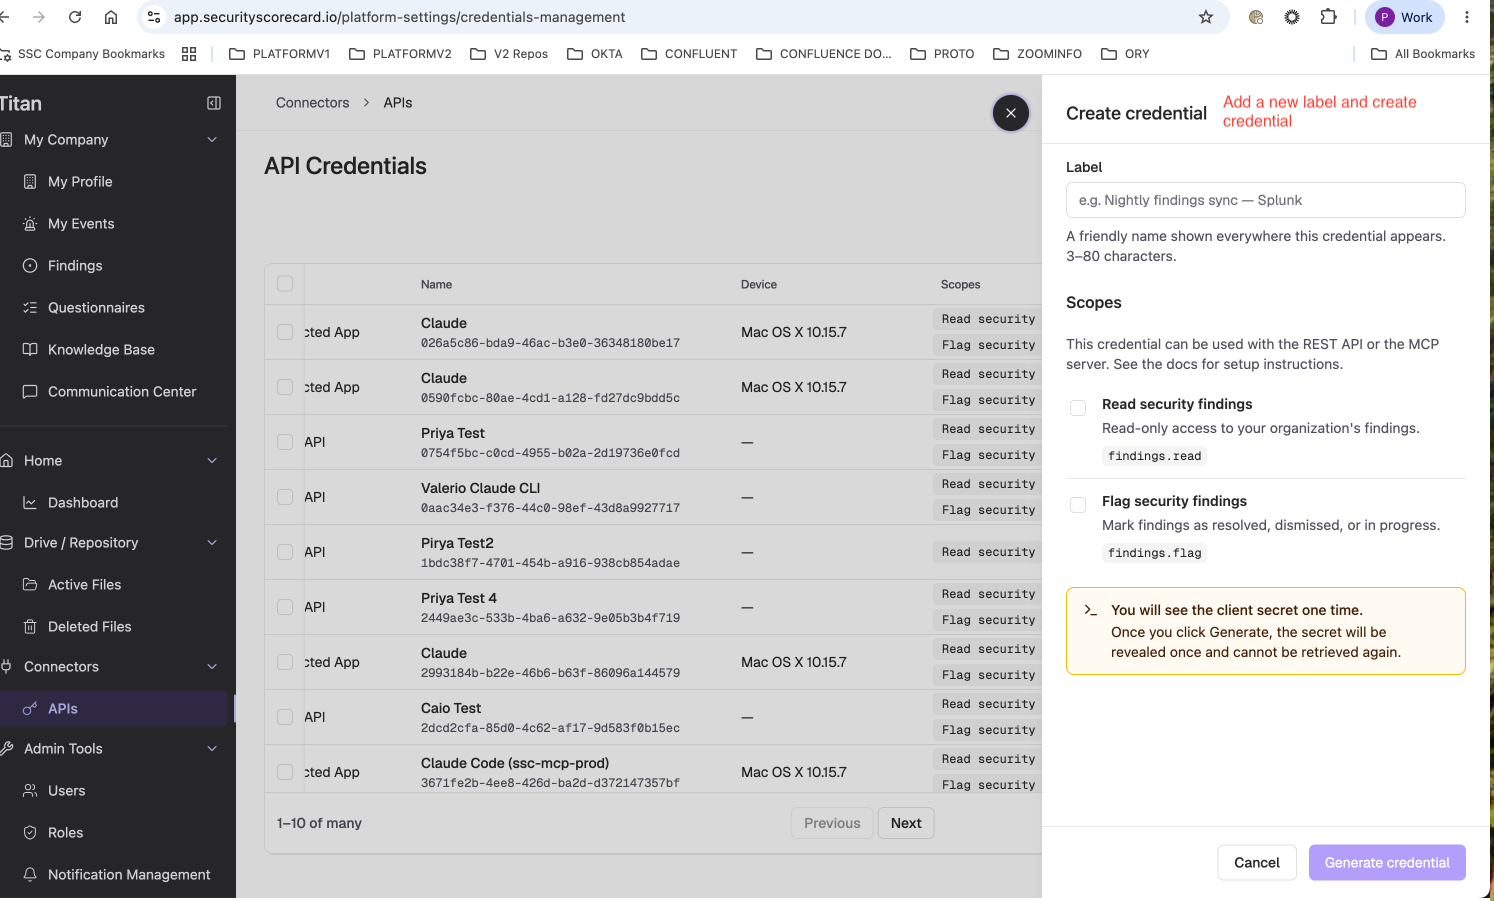
Note: The client secret is revealed once, immediately after you click Generate credential. Once you dismiss the dialog, the secret cannot be retrieved again — you'd have to create a new credential and delete the old one. Have your secret store ready before you click Generate.
After clicking Generate, the dialog shows the newly-issued Client ID and Client secret. Copy both immediately into your secret manager, or download the pre-formatted .env file with the Download .env button.
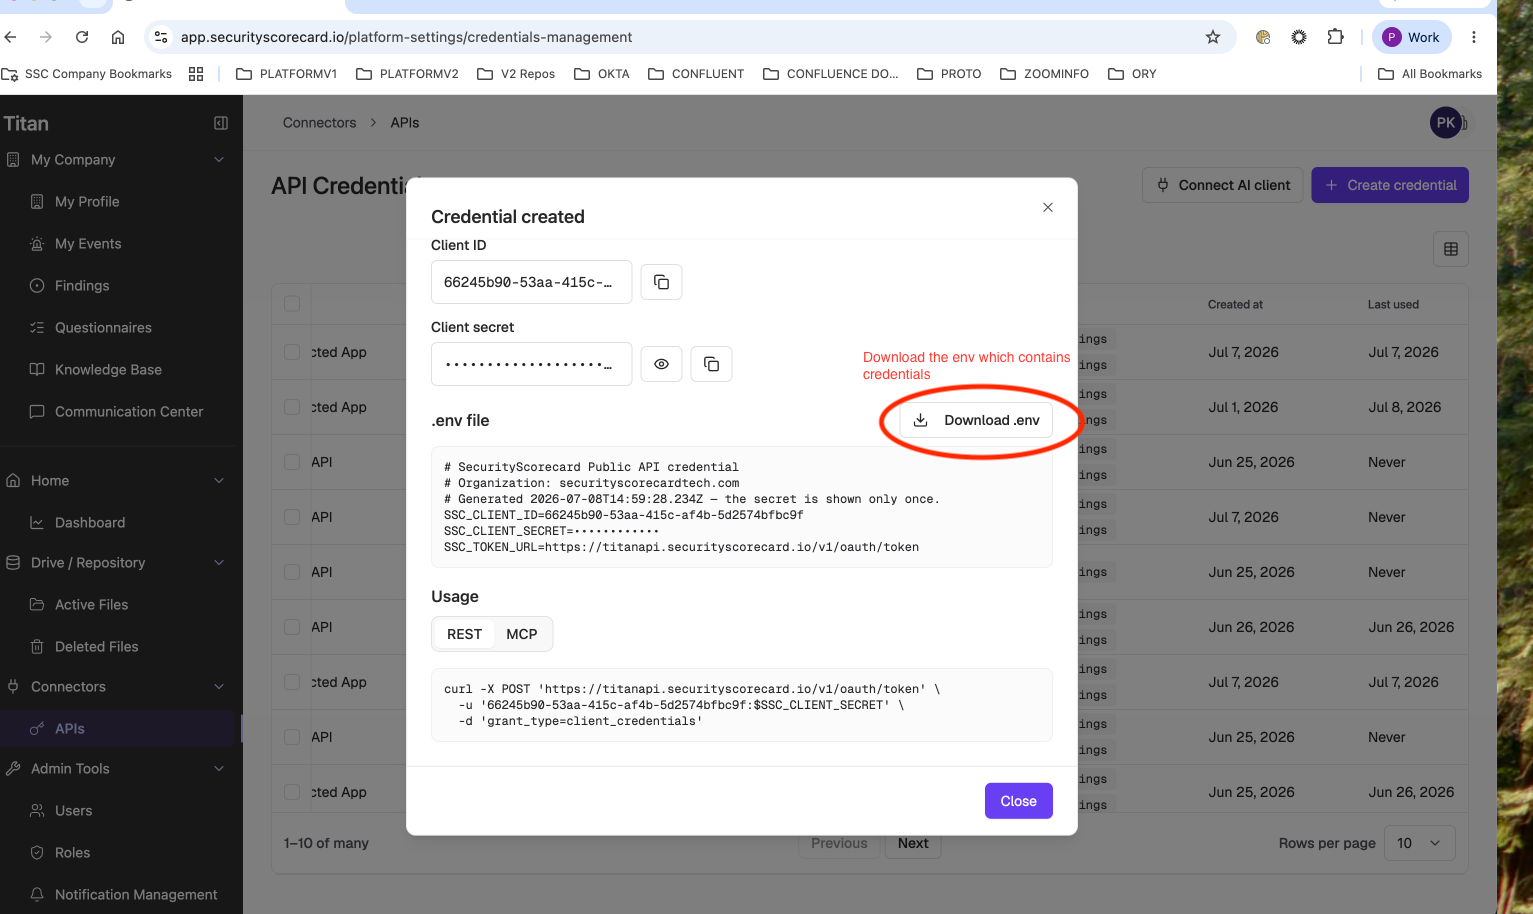
With the CLIENT_ID / CLIENT_SECRET in hand, exchange them for an access token:
TITAN_API_TOKEN=$(curl -sX POST 'https://titanapi.securityscorecard.io/v1/oauth/token' \
  -u "$CLIENT_ID:$CLIENT_SECRET" \
  -d 'grant_type=client_credentials' | jq -r .access_token)
The response includes a bearer token and its lifetime. Cache the token until it expires — do not exchange credentials on every request.
With the access token in hand, call any public endpoint. Endpoints live under the /public/<major>/ path prefix:
curl https://titanapi.securityscorecard.io/public/v1/observations \
  -H "Authorization: Bearer $TITAN_API_TOKEN"
A successful call returns a JSON payload with the resource data.
The client credentials you just created work for both REST and MCP — the Titan MCP server accepts the same OAuth bearer token. See the MCP guide for the endpoint URL, client configuration, and a tools/list example.
Credentials should be rotated periodically. To rotate:
- Create a new credential pair with the same scopes as the old one.
- Roll the new pair out to callers.
- Once every caller has switched over, delete the old credential from the Connectors → APIs page.
- Browse the full endpoint catalog in the API Reference (sidebar).
- Learn how versioning and lifecycle signals are surfaced on every operation.